Add Classes
Last updated: November 20, 2026
Classes help you organize your services (line items) and make it easier to group them during invoice creation. By grouping line items into classes, you can better understand where your revenue is coming from. ServiceCore also has reports, like the Line Item by Class Report, which show how classes are appearing on invoices, giving you insight to how much income each class generates.
Before You Start
Here are a few things to know before you continue:
To see if you have access to this feature in ServiceCore, please check out this article on user permission levels.
Common ways that Classes are used:
Categorizing income types (e.g., rental income, labor costs, portable toilets, roll-off, septic).
Categorizing sales reps (for example, if you pay commissions to sales representatives based on their sales).
Click here for step-by-step guidance in your ServiceCore account when adding a class
Add a Class
To add a Class, follow these steps:
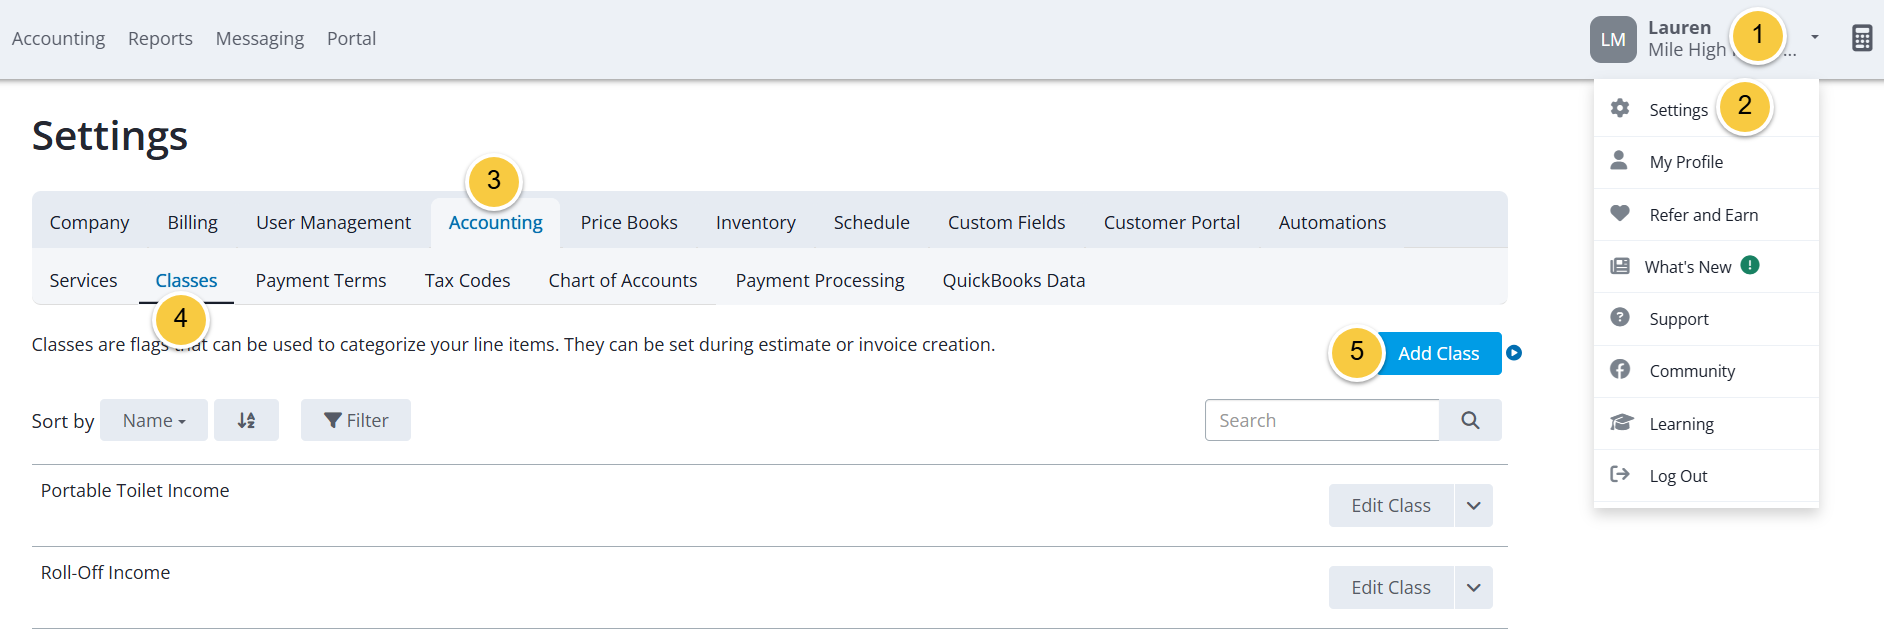
Click your name in the top right corner.
Select “Settings.”
Click “Accounting.”
Select “Classes.”
Click the “Add Class” button.
Enter a Name for the class.
Click the “Add New Class” button.
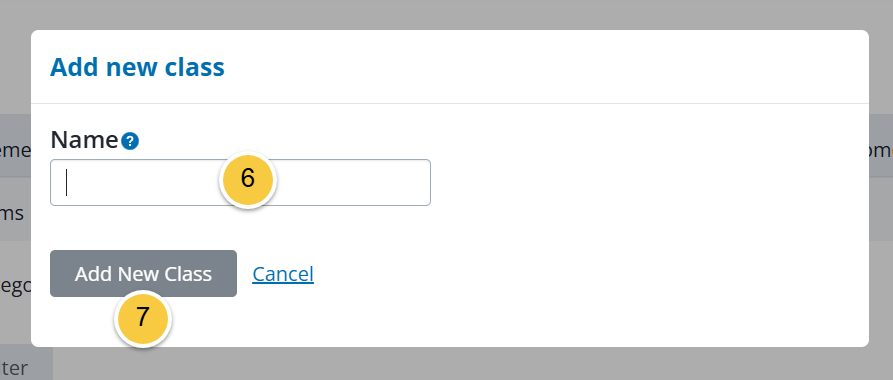
TIP: Common examples of Class names are based on employee or sales rep name, services provided, or specific parts of the business.
Manage Classes
Once a class has been created, you can edit or deactivate it.
Click the down arrow in line with a class.
Select to "Edit Class" or "Deactivate Class."
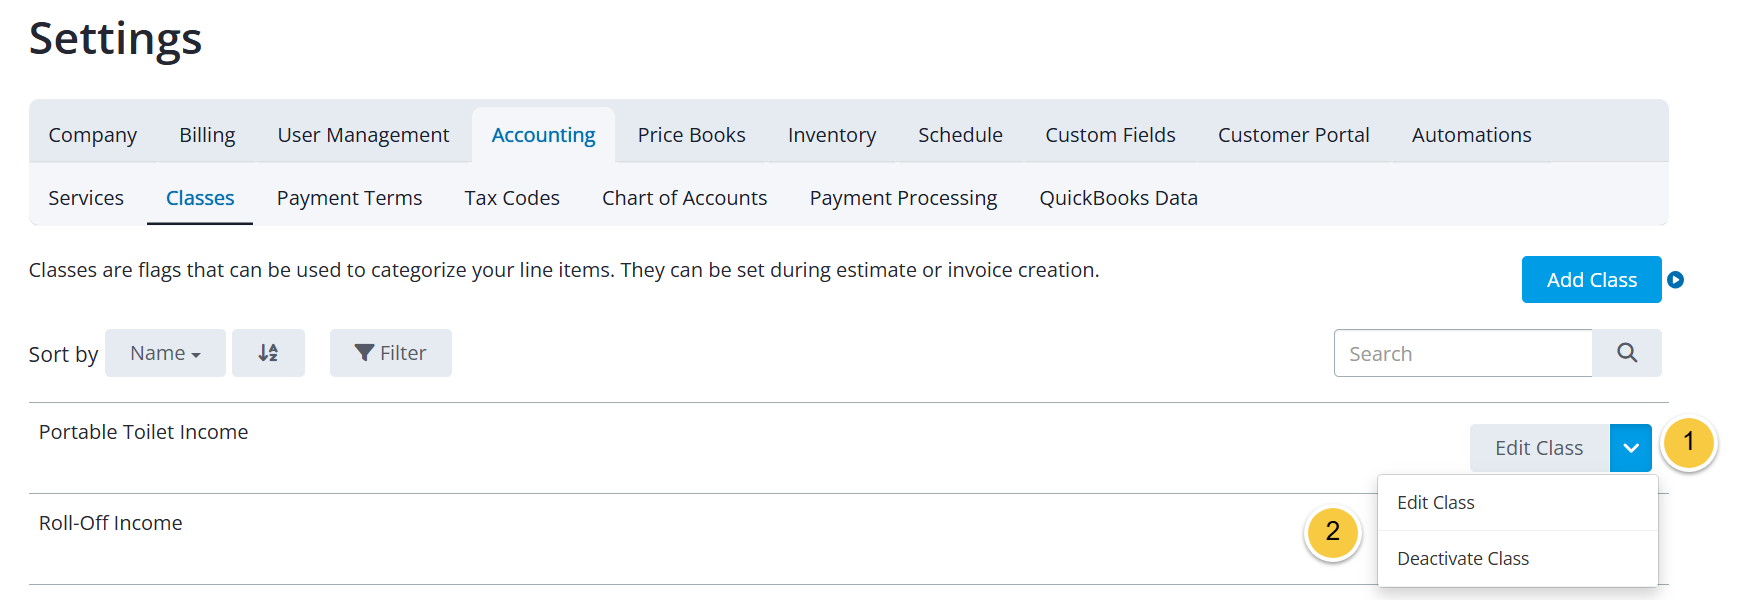
TIP: Use Filter to narrow your list of classes by status. You can view inactive classes and reactivate if needed.
Assign a Class to a Job Line Item
When creating or editing a job, you can assign a Class to each service line item in the "Services and Notes" section. Use the "Select Class" dropdown next to each service to select a Class. This lets you track revenue by Class from the moment the job is scheduled, instead of tagging it later on the invoice.
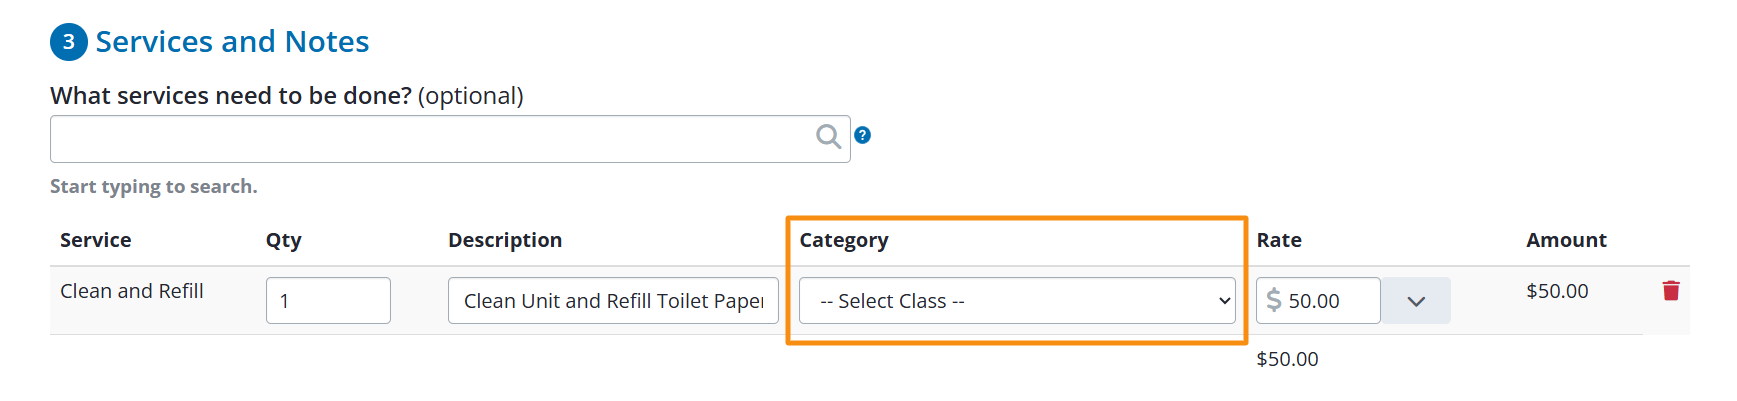
Please Note: If you use QuickBooks Online, Classes assigned at the job line item level sync to your QBO account.
If you have any questions, please reach out to our Support team through the chat widget on the bottom of this page or by sending an email to support@servicecore.com!